
A spherical panorama is one that captures, not just 360° around, but all the way up and down too. It captures every direction. I want to show you how you can hand draw (or sketch, paint, etc.) these panoramas.
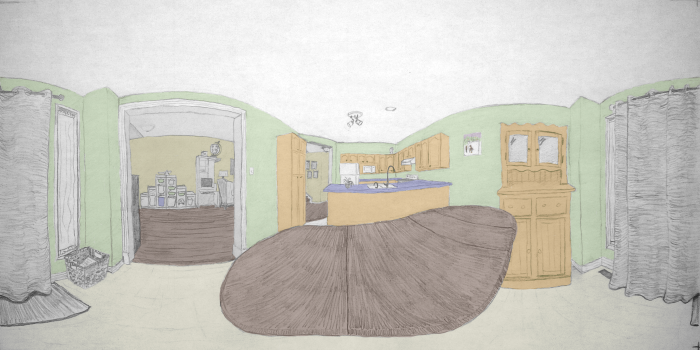
For instance, here’s my kitchen.
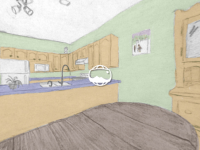
And if you can draw one that adheres to the equirectangular projection, you can upload it to sites like Flickr and Facebook which provide interactive panorama viewers like these ones:


Hand drawn panoramas are an uncommon art form but they aren’t new. Artists like Dick Termes, Matthew Lopas, Jackie Lima, Arno Hartman, and Tom Lechner have been drawing or painting complete or ultra-wide-angle panoramas for some time. Matthew Lopas’ facebook page features many such paintings, and Tom Lechner’s flickr group has more examples.
Fun right? It seems there are as many ways to accomplish hand drawn panoramas as there are artists doing this. I can show you how I did mine. Follow along.
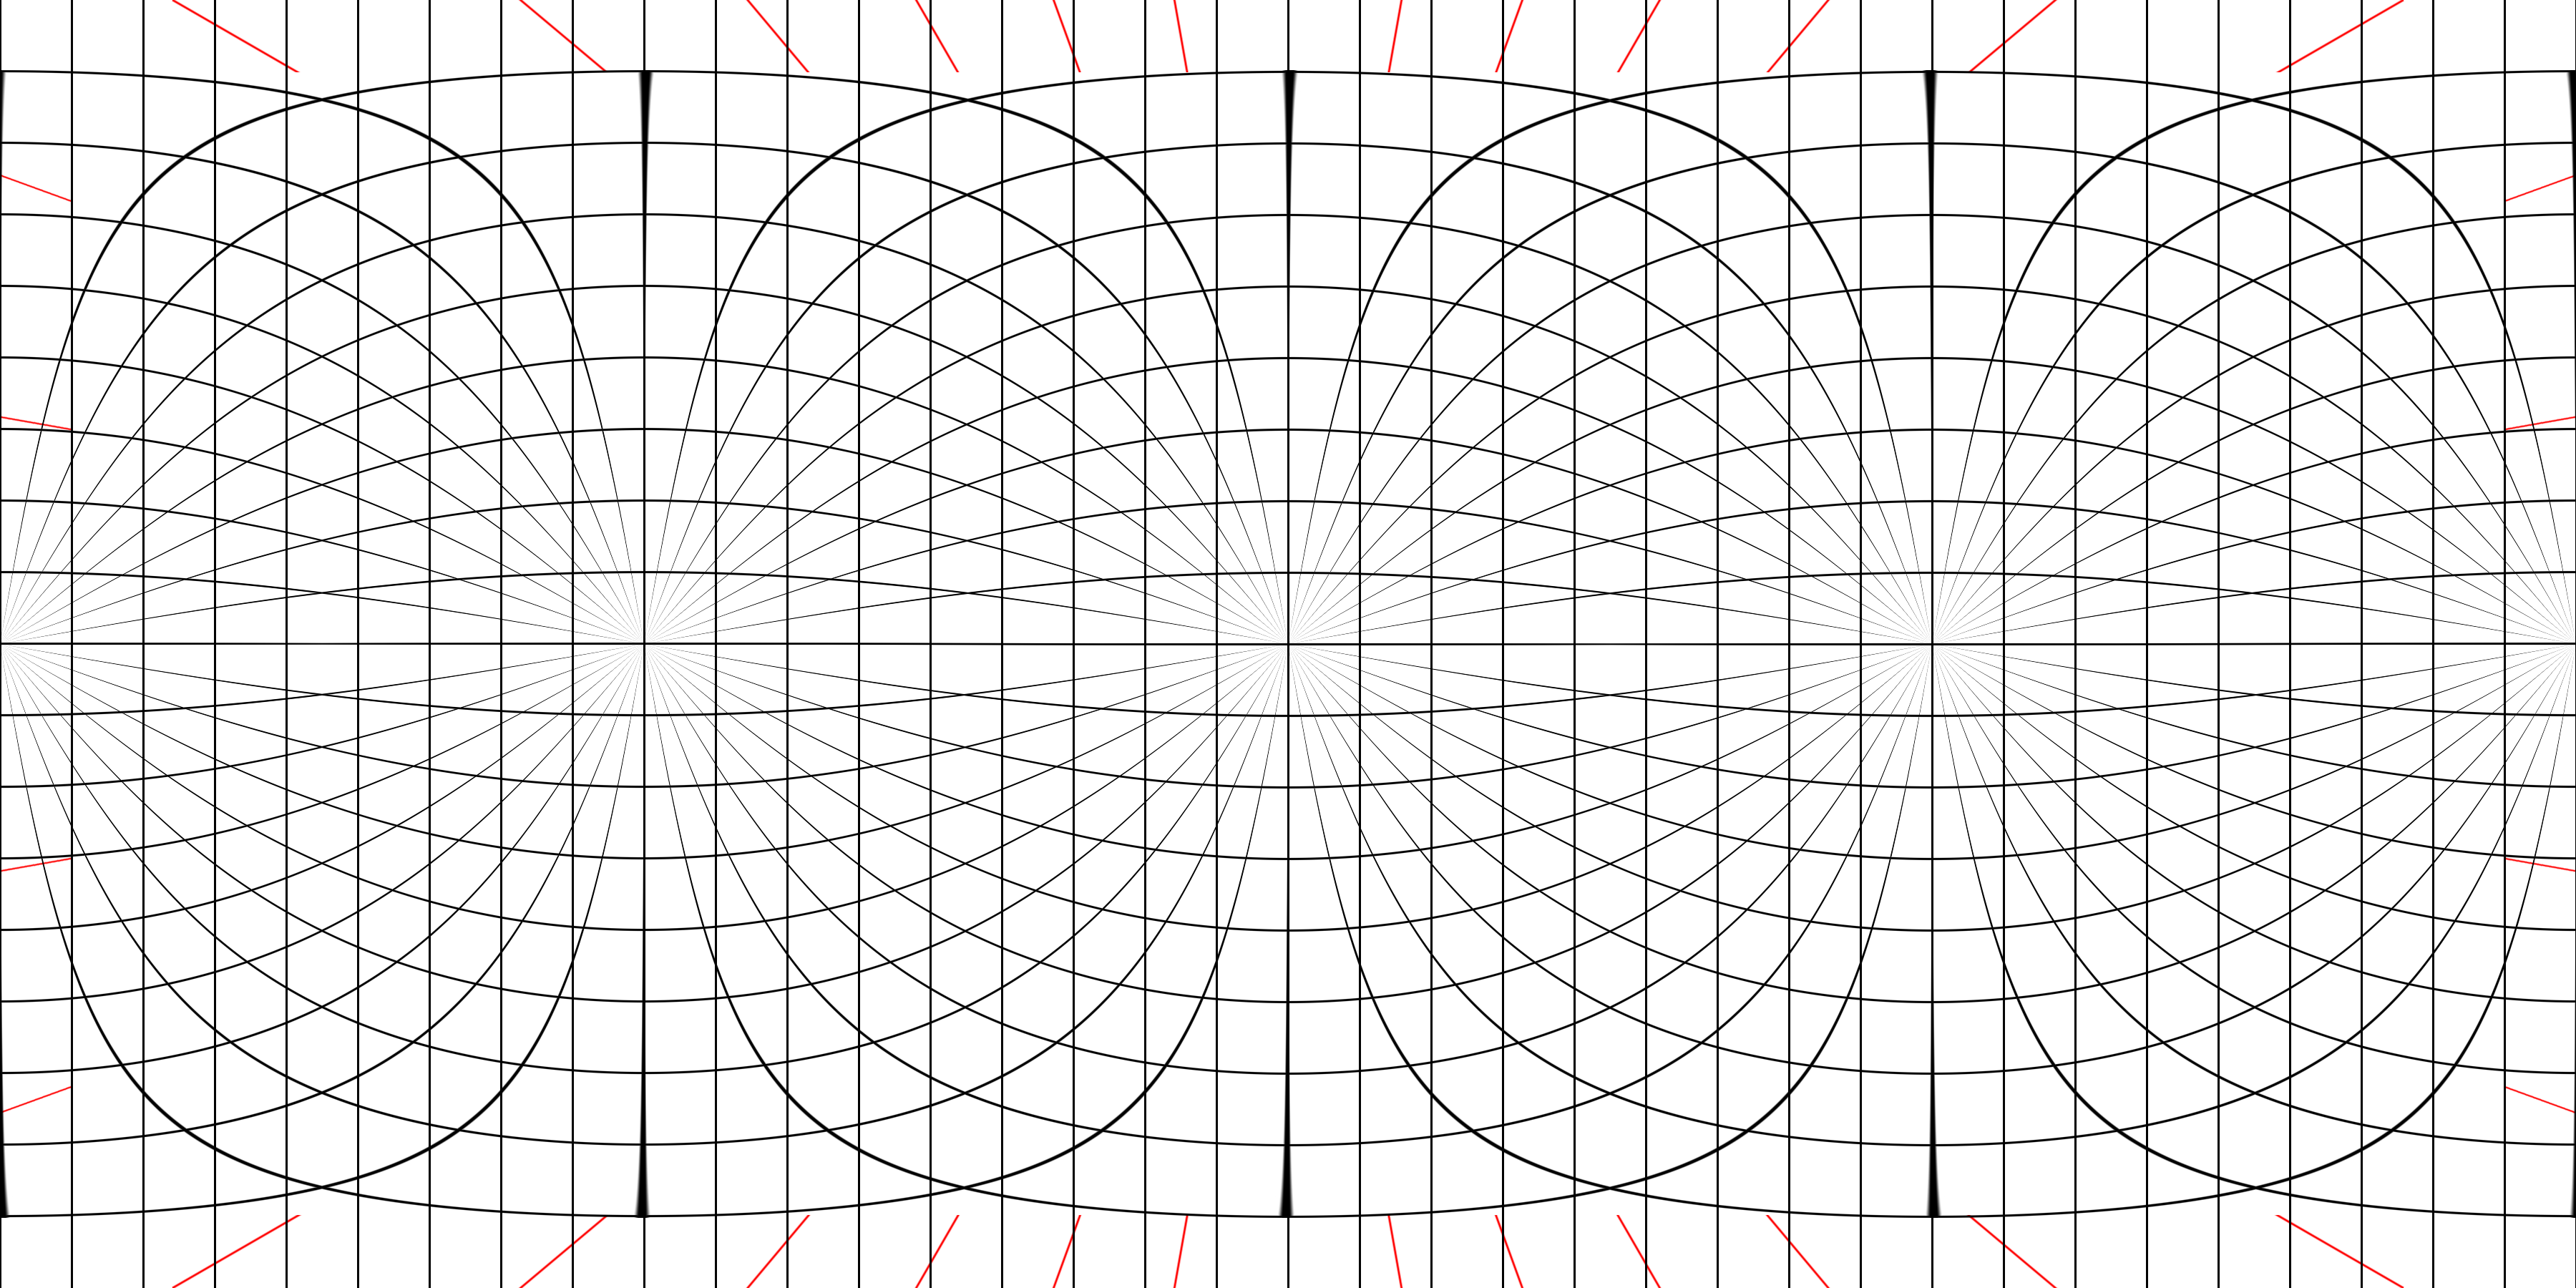
Step 0 – Get familiar with equirectangular projections
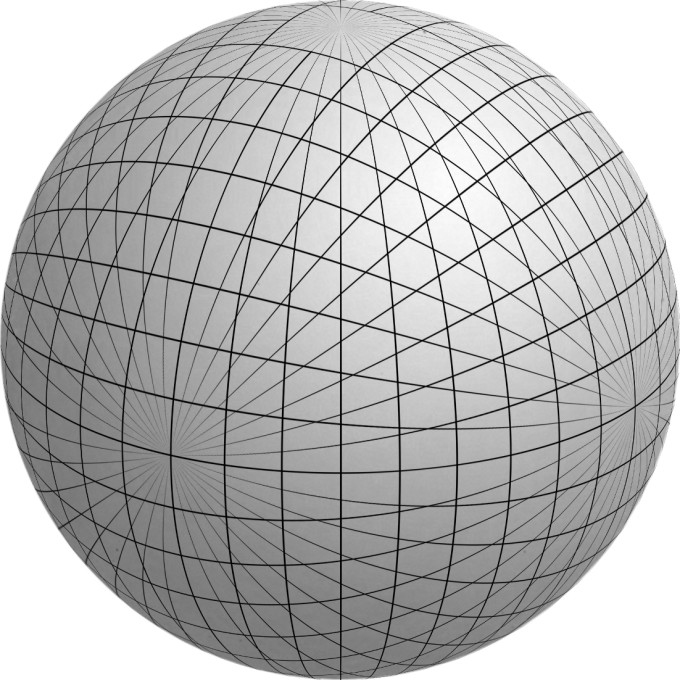
It is a good idea to become familiar with what an equirectangular projection is before you head out to draw one. Skip to step 1 if you are. If not, here’s one now!
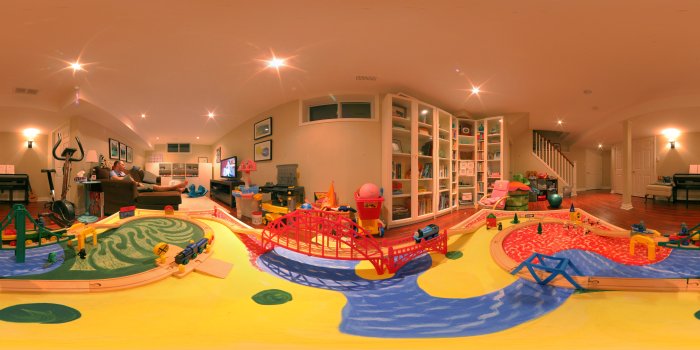
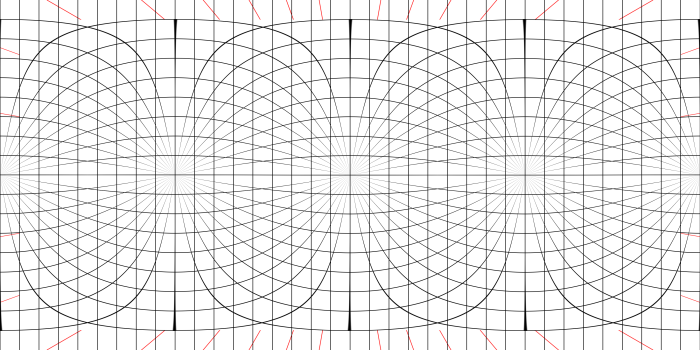
An equirectangular projection maps your surroundings to a rectangle with 360 equally spaced degrees from the left to right and 180 equally spaced degrees up and down. Have a look at the equirectangular group on Flickr for more examples. Notice how the the left side wraps around and continues on the right. Also notice how the top and bottom get all stretched out.
Let’s do a demonstration. From where you are sitting now, notice that an edge coming from one corner of a ceiling will be angled upwards. Do it. Look up from your screen. Then, scanning along the top of the wall to a point right in front of you, that edge will be level. Moving further, the corner will be at a downward angle.

Really that’s all an equirectangular projection is doing. It’s changing the orientation of things to appear as they do when you turn your head to scan the room.
The method below helps us draw these curves properly.
Step 1 – Get setup
Pick a location with plenty of rectangular shapes and lines.
Get your drawing materials: pencil, eraser, easel, and paper.
Download and print a version of this equirectangular perspective grid. Legal size paper (8.5″×14″) is a great size for this purpose.
I have two ways of superimposing (subimposing?) this grid onto paper. The first one is straightforward. Use tracing paper and tape or pin it down on top of the grid. The second is to print the grid onto the back of the paper you’re drawing on. Then, when you’re drawing, make sure the paper is on a light surface so that the black lines on the back of the paper show through.
Step 2 – Locate your surroundings onto the grid
Align yourself with your surroundings. Pick a wall or a building to be forward and face it squarely. Now you can associate six main real-life directions with these locations on your grid:

The sets of lines emanating from each of these directions are spaced 10° apart. One set of lines go from straight forward to straight back, one goes from left to right and the third set go up and down.
Your job now, is to figure out where each item in your environment belongs on the grid paper. You need to measure two angles. The first is the horizontal angle between straight forwards and your object: the azimuth. The second is the vertical angle between your object and the horizon: the altitude.
Azimuth
 If you’re lazy and don’t care too much about accuracy like me, you can follow the astronomers’ tricks described here to measure angles from the known points in your scene.
Another method uses the red marks that I placed the edge of the perspective graph paper. With your paper level, each red tick mark will indicate the direction from the center of the paper out towards your environment in 10° increments.
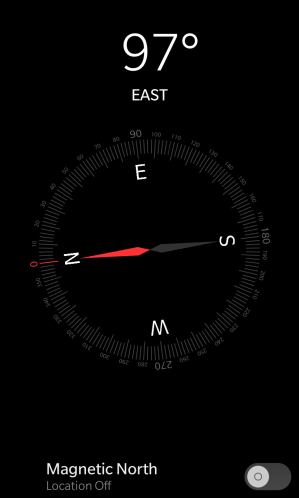
A third way is to use a compass app on your smartphone. You’ll have to do a little math. For instance, if your compass says 97° when facing forward and it says 128° when facing an object then the object has an azimuth of 128° – 97° = 31°.
Altitude
To measure upwards (or downwards) from the horizon, imagine the horizon line and then use those astronomer tricks again.
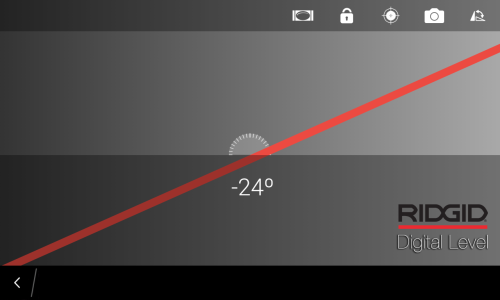
For a more mechanical method, what you want is a clinometer. Look online for how to make one yourself – you can even buy them ready made.
And of course your smartphone can do this too. Many level apps have a clinometer mode. Just look along the long edge of your phone like a sight.
At this point, it’s good to mention that it’s up to you to decide how independent you wish to be from technology. If you go too far, you might as well just trace a picture taken by a spherical camera. On the other side of the spectrum you can just forgo the grid and wing the whole thing. What I do, is I keep the grid paper, but I do without the smart phone apps.
Locate your point on the grid
So, now that you have the altitude and azimuth of a point in space, you can find where it is on your grid. You’ll want to locate the altitude first. Here’s an example. Say your altitude is 65° and your azimuth is -45°. Starting at forward, go 6½ lines up, and then 4½ lines to the left.

Step 3 – Draw!
Draw the straight lines of your scene in the same fashion as a 2-point perspective drawing. That is, if the line in the scene is plumb, draw the line vertically. If the line is forwards / backwards, follow the direction of the lines that go between the forwards / backwards vanishing points. If your line in the scene goes left to right, follow the lines that go between the left / right vanishing points.

I like to start straight forwards and build outwards.
You may rely on previous line placements. Say you’ve drawn one corner of a rectangle, follow the edge along the graph-paper lines to get to the next corner.
It might help to embrace imperfections. If lines aren’t meeting up where they should be, look for compromises.
In an equirectangular projection, the top and bottom become extremely distorted. So drawing your chair might be difficult. More often then not however, the space straight above you (the zenith) and the space below you (the nadir) are rather featureless.
Do more! This method will layout your scene but for heaven’s sake, if you have a favourite medium (pen and ink, paint, digital painting, woodcut printing, watercolor, etc.), then by all means use it.
Step 4 – Scan, upload and share
Mark the corners of the sketch. They’ll be useful when you crop and align your scanned picture.
If you have grid printed on the back of your paper, scan or photograph your drawing with a dark paper behind it. The grid will disappear, and only your drawing will stand out. But if you used tracing paper, put a white paper behind it.
Once you’ve scanned your picture, photo editing software can help you straighten, crop and scale it to match the 2:1 aspect ratio.
You can share it as is. But to get the immersive view on Flickr, tag your image with the tag ‘equirectangular’. For Facebook, things are a lot trickier. You have to set the image’s metadata before uploading it.
Personally, I like to transform spherical panoramas using interesting mathematical mappings. This gives me a chance to ‘compose’ the image into something dynamic. Stereographic images usually turn out very nicely.


Awesome Dave! I’m going to try to use this for my work (sketching out patterns observed in my scenes).
LikeLike
Nice tutorial!! Can I make this in Adobe Illustrator? But I don’t have so much skill in drawing, how can I’ll make the pictures fine then? 😦
LikeLike
Desca,
I’m sure Adobe Illustrator will work.
To improve your drawing skills, there’s nothing like practising (of course).
Give it a try. Your pictures may turn out finer than you expect.
LikeLiked by 1 person
Thank you for taking the time to articulate your process. I stumbled upon your post while researching ways to overlay a grid system on 360 photos. This was super helpful!
LikeLike
happy to help!
LikeLiked by 1 person
This was very helpful, thanks! I’m trying to draw a panorama to go on a terracotta pot, so because of the conical rather than cylindrical nature of said pot, there is still a tad more problem solving to happen, but this was helpful nonetheless. (Any tips would be welcome, you seem to have a good grasp of this stuff, but otherwise, thanks very much for the information already provided in this article!)
LikeLike
would you agree if this is like they used to do the sketches on 8bit for the legend of zelda dungeons? or how would you put it?
LikeLike
I had a quick look at what I think you mean. This isn’t quite the same. The zelda dungeons are more or less an overhead view.
LikeLiked by 1 person
I got a question about the last step of the process, how do you cut and paste the whole image to give it the spherical perspective. At first you got a a linear drawing but at the end, which is what we are looking for is totally spherical or fisheye. how do you accomplish that?
LikeLike
If you don’t want to write your own code. A program like hugin can do it. If you can, look into flaming pear’s Photoshop plugin called “Flexify 2”
LikeLiked by 1 person
hi, i got several questions, i read this but i havent got quite right at the bottom of the fisheye drawing. I have followed the steps as shown on the following url, but i at the end i got a image so intertwined that its just madness, the drawing gets mixed it up and nothing can be appreciated, how can i send you what i have done? And i dont use photoshop, I mostly do it with an ipad, first i do it on paper then i put some color on the ipad, and then i try to convert it into a 360 video but i havent succesfully accomplished.
Hope you can help me.
Best regards.
https://www.quora.com/Can-I-convert-a-photosphere-jpeg-image-into-a-360-video
LikeLike
Sure – why don’t you just email me any images of what you have so far and then ask your questions.
I can answer anything easy. But I can’t promise any answers that may take a lot of time.
LikeLike
Very helpfull, thanks!
LikeLike
Hi!
I just wanted to finally say thank you for this amazing post. I followed all the steps you describe here about two years ago to create my own hand-drawn Virtual Tour — and it worked beautifully!
Life, school work, family, and other projects kept me busy, so my intention to thank you properly stayed on my never-ending “to-do” list… until now. I’m really glad I can share my results with you at last!
Here’s the article where I documented the whole process:
How I made a Virtual Tour
In my article, I also included a link back to your blog so that others can follow your original sequence of steps. Your work was essential for me to understand how to approach this project, and I had a lot of fun putting it all together.
Thanks again for sharing your knowledge and making this possible!
Best regards,Víctor Gómez
LikeLike
That’s great to hear. I’m glad you found it informative.
LikeLike