
In a recent talk, I was asked how I make nice figures of polyhedra for my slides. I do almost everything in 2D and in gimp. Here’s how.
Step 1 Find a base image
I’m assuming you’ve done the hard part already – which is finding an image or a layout of your vertices somehow. Let’s say you have an image you like, but you don’t like the colors. Or maybe you have a photo of an interesting polyhedron, but it wouldn’t make a suitable figure.
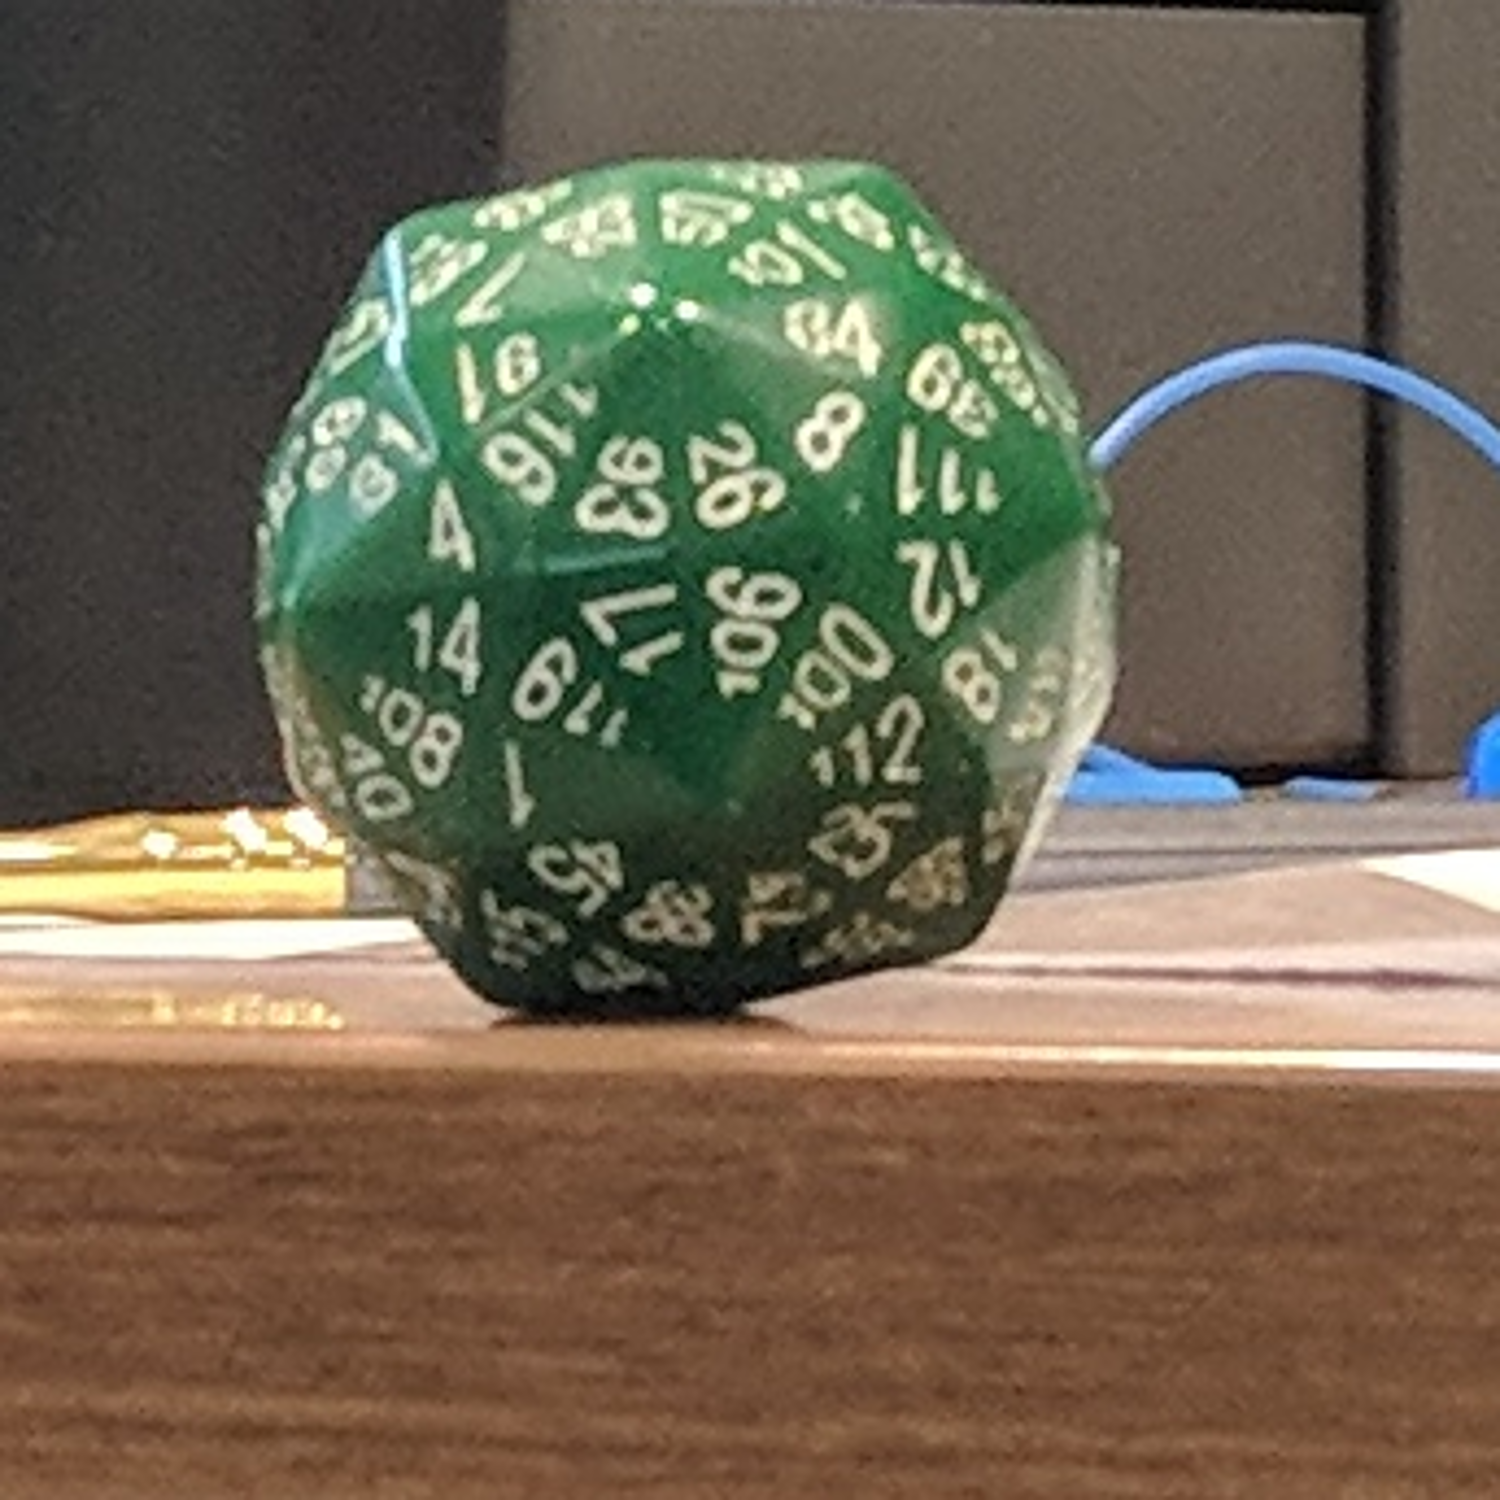
I’m going to start with this zoomed in photo of my d120 from the Dice Lab here:
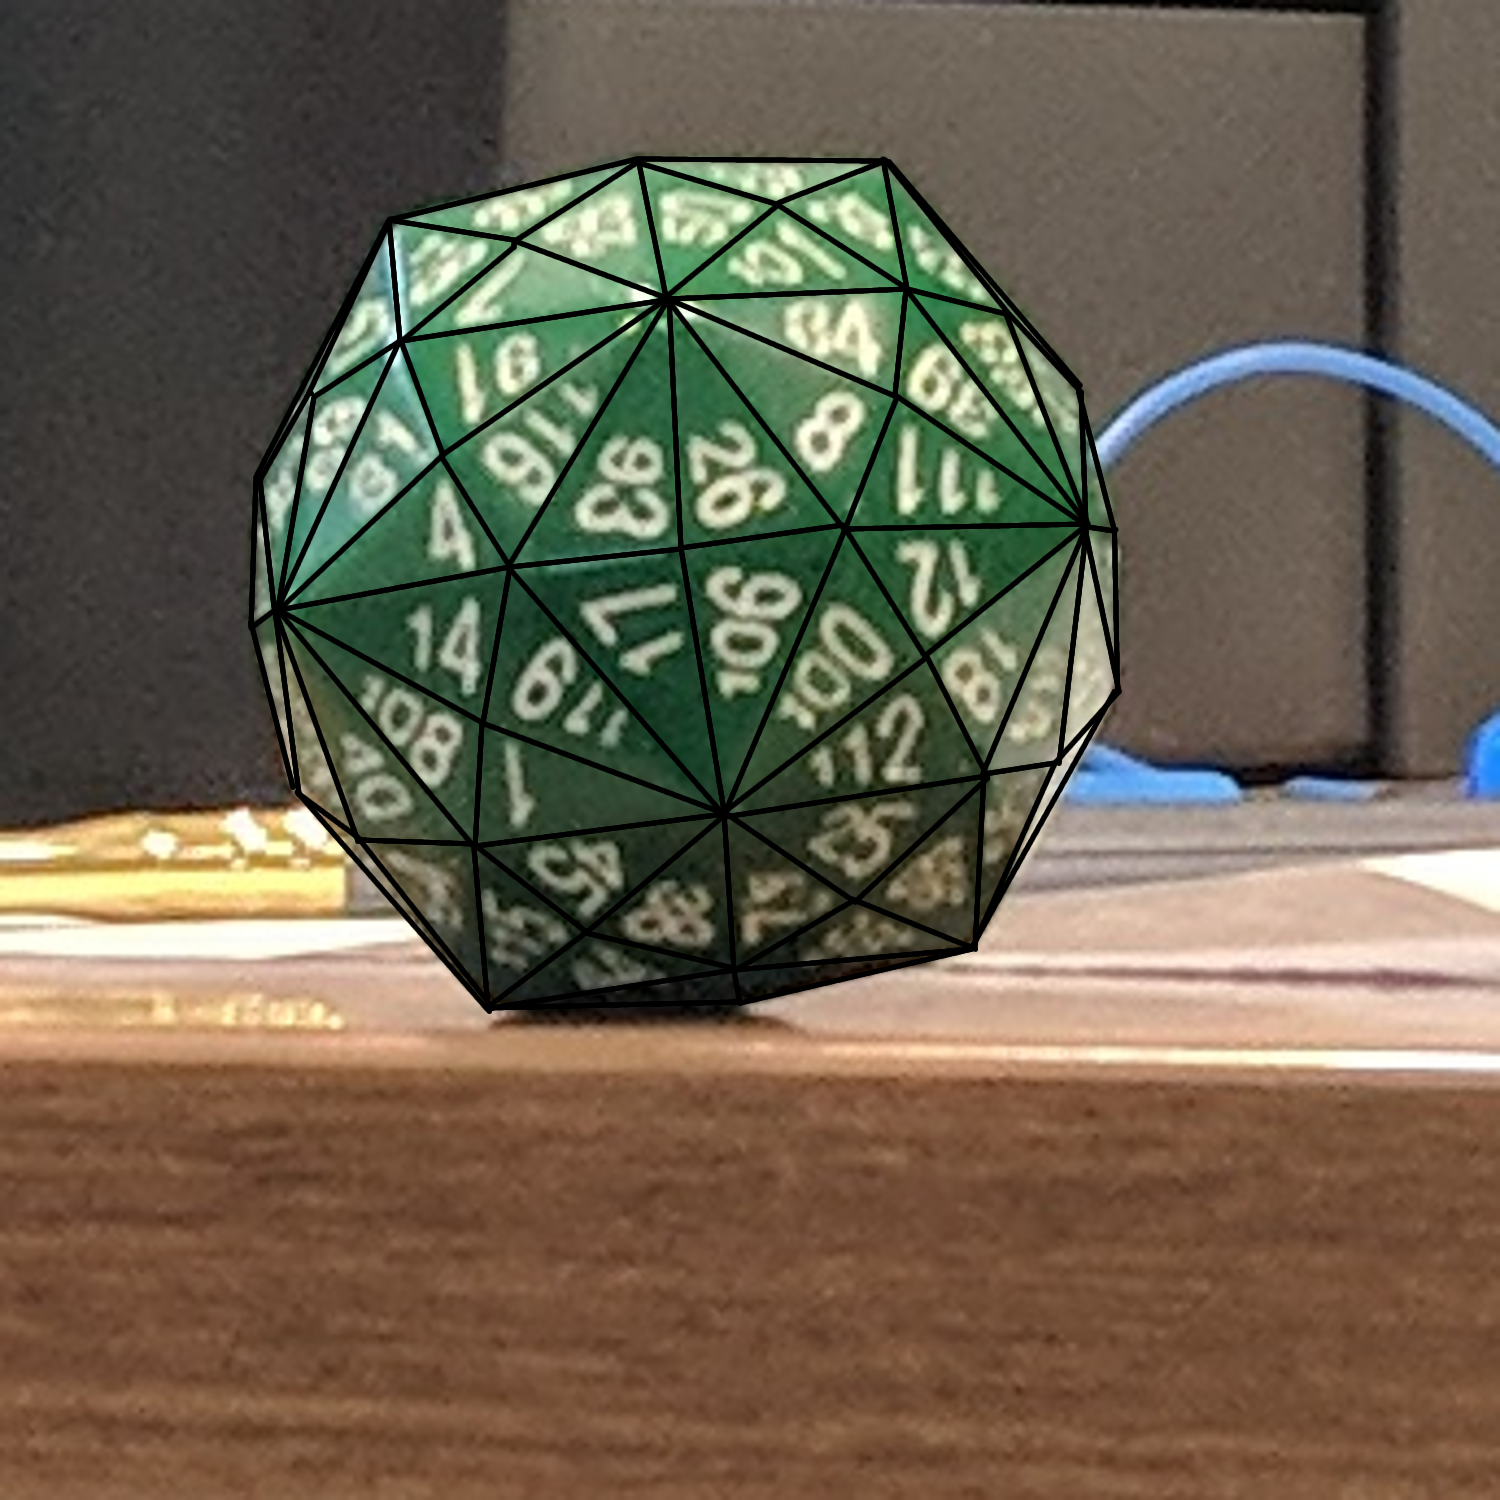
Step 2 Trace!
I’m not above tracing. It gets the job done. What are layers for? Amiright?
Step 3a Fill in the faces
So here’s my awesome trick. I take a photo of a cueball, or any white sphere really.
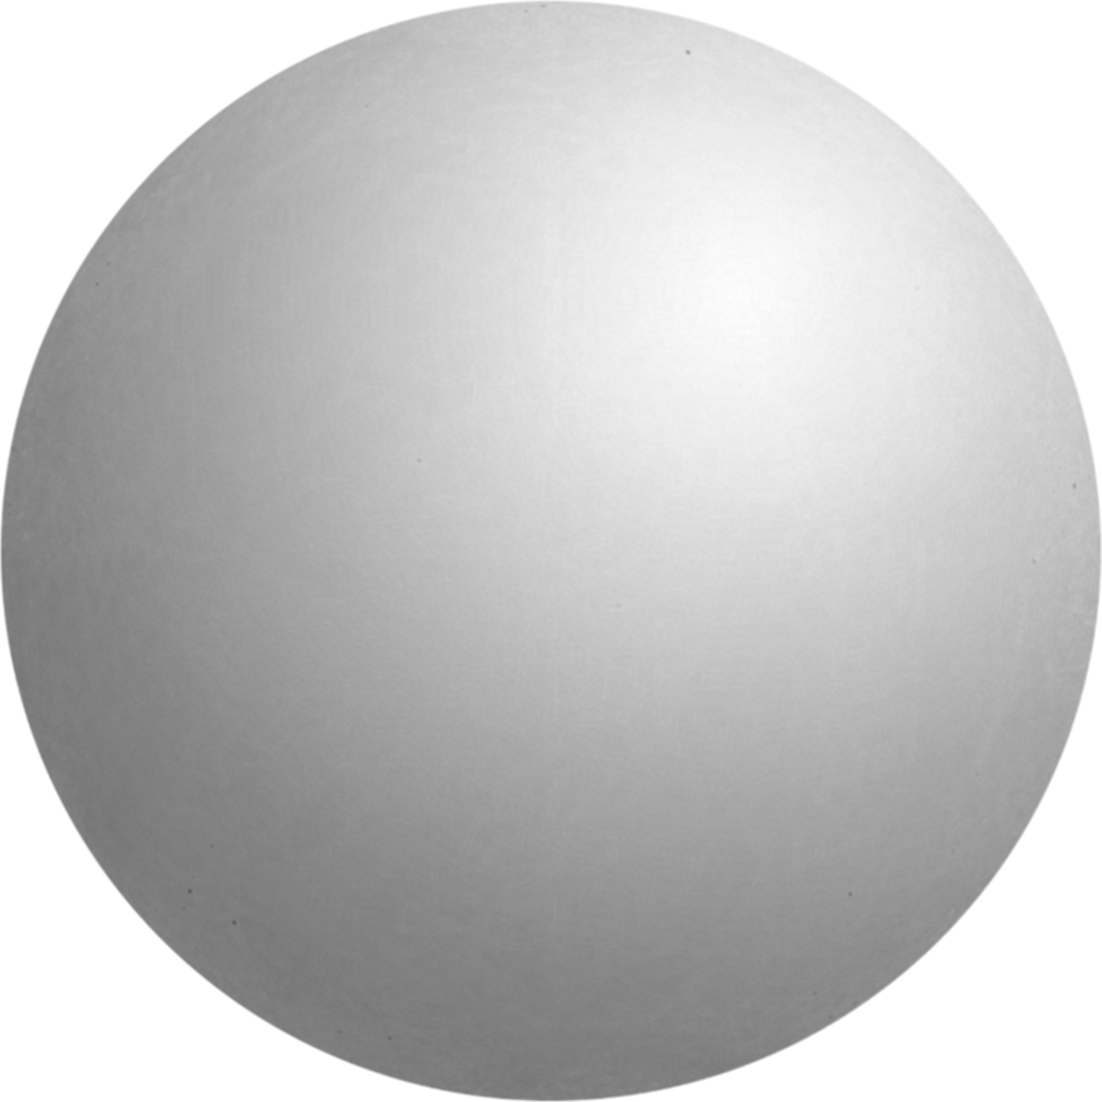
And use the color picker on it to get what color each polyhedron face should be. Use the eyedropper on the point on the sphere that points in the same direction as each polyhedron face, and then bucket fill the face with the relevant picked color.


Is it anywhere close to perfect? Not at all. Is it good enough? Damn straight.
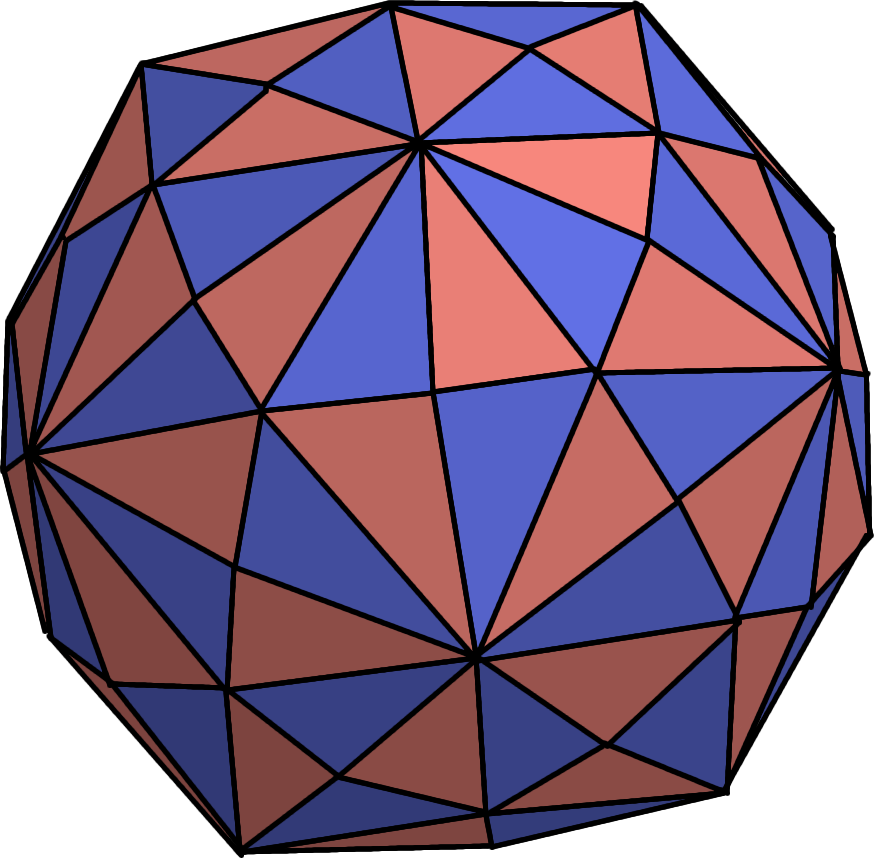
Consider adding color with a judicious use of layers. For example, duplicate the polyhedron layer and set it to multiply. Add colors by filling each face with the desired face color. Then the multiply layer will preserve the 3D effect.
Step 3b Add a wire cage effect
I cheat a lot. Sometimes when I want my polyhedron to look like a wire cage rather than a solid. I’ll duplicate the traced wire frame layer, rotate the duplicate 180 degrees and reduce the transparency. It looks like this.

Bonus trick
Remember that white sphere I used in Step 3a? You can copy it to your clipboard, and then with the right settings you can use your clipboard as a brush, to make ‘atoms’.
Here’s an example I did earlier where I clicked a sphere onto each vertex of the front layer:

