
Heya! My name’s Evan, and I’m D.M.Swart’s son! You might remember me, as there were photos and mentions of me in the previous blog post about a woodcut known as “Frog”. Speaking of which, we’re here to tell you about our other woodcuts (and linocuts) we’ve done over the past few years. First things first, this is not going to be a how-to – just a plain and simple recording of our trials. Here are some of our other cards:


Now, this blog post is about our latest card. When I say trial and error, this definitely has to be one of our most error-y cards yet. You may wonder why this post is titled “Variety”. It’s because we got a variety of “quality”.
Concept Art
We started out in November when my dad D.M. Swart showed me some pictures of silhouettes of Santa and his reindeer flying over the moon. I had been toying with the idea of a snowman for our next card. We compromised and put the two ideas together. I sketched out some concept art, one of which turned out to be the final sketch after a few minor tweaks.
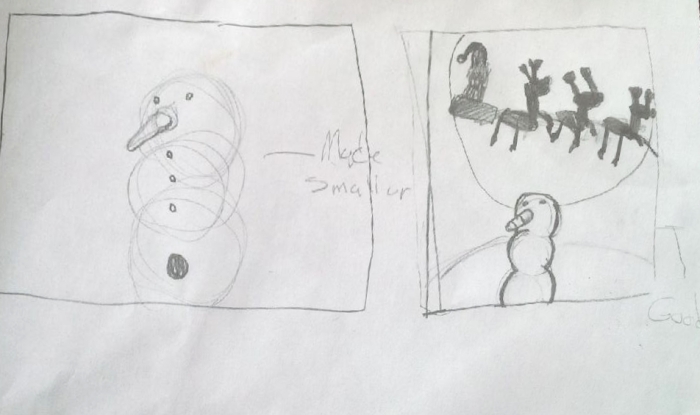
The one on the right is the one we went with. We scanned it in added some details to the moon and the hill.
Wood Blocks / Image Transfer
To make the wood blocks smooth, we prepared them by putting on a thin coat of gesso, which is like white paint mixed with plaster. After we decided on the final design, we printed out the new and improved “tweaked” image onto paper. To get the images (one for each block) onto the wood, we used carbon paper and traced over the sketches:
Carving
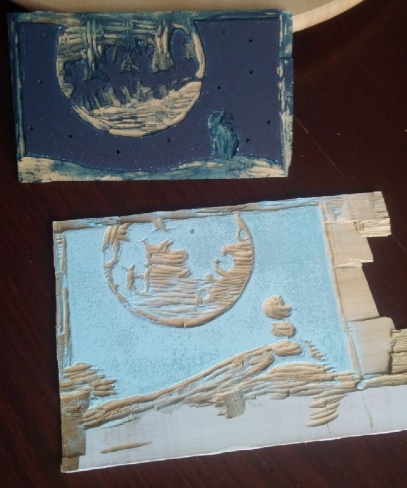
Later, after we had the image on the block and all, we began to carve. My Dad carved his block, the light blue one, first. I did the outer edges of what was originally going to be a gradient black and blue block (see next section) and I drilled the holes for the stars. My dad did the rest.
Proofs
First Proofs
We began a proof, sort of like a test inking so that we could determine our mistakes. We took some of our cyan ink and did the proof. It turned out well, and we didn’t have to do much in the carving department.
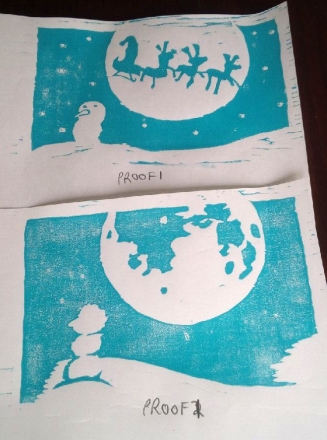
Colour Proof
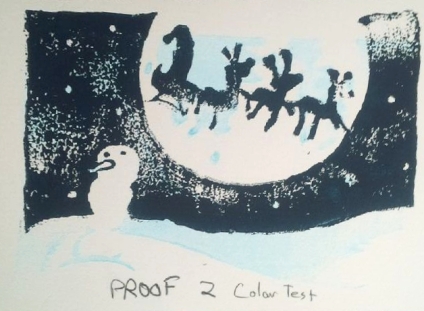
The colour proofs were to test the colour, and how well the blocks were aligned. We mixed cyan and white to get the light blue for the first block. We mixed blue and black for the second block.
As you can see, this is where our adventure started. The ink from the second block had a hard time sticking to the paper.
Printing
Gradient attempt
We wanted the sky to be a gradient from black at the top to dark blue at the bottom. Because we had such a hard time with getting the ink to stick, the prints with the gradient were a disaster. So we said to ourselves “We’re not doing a gradient”.
The Rest of the Run
At about print #20 we realized that the rolling brayer wasn’t working well. So we used a good old-fashioned wooden spoon and our thumbs to get the ink down.
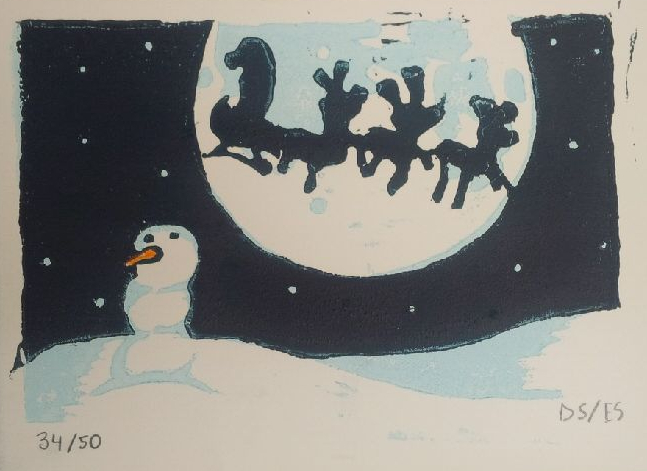
Final Result
I’d say that in the end it turned out pretty okay. We used an orange pencil crayon to colour in the nose of each snowman. We signed and numbered each print. Every person we gave it to was pretty tolerant of the result.
I’d say we learned a pretty good lesson. Never use a gradient or else all your prints will go downhill – even if you abandon the gradient.
And so here’s our Christmas card to you reader,
Merry Christmas and until next time bye!
From Evan

I thoroughly enjoyed reading about your design and production process. I love hearing what works and doesn’t work – sometimes I can relate to the problems…and sometimes I learn a new technique. Your finished card looks great; congratulations!
LikeLike